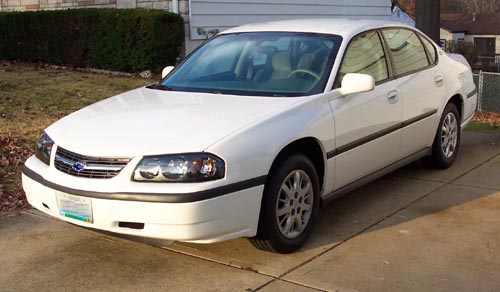
I purchased this 2004 Chevrolet Impala from Don Brown Chevrolet in November, 2003. I was able
to order it with exactly what I wanted, and leave off what I didn't. All I really cared to have was the
bigger engine (3800 V-6) with a fold-down rear seat so I could put my bicycle in back. I did NOT
want the spoiler and "sport appearance" package you normally get with the bigger engine. Fortunately,
they were able to order my particular options and leave off the rest, resulting in a bit of a
stock-looking "sleeper".
My friend David is the fleet dealer at Don Brown, and normally orders police Impalas for the various
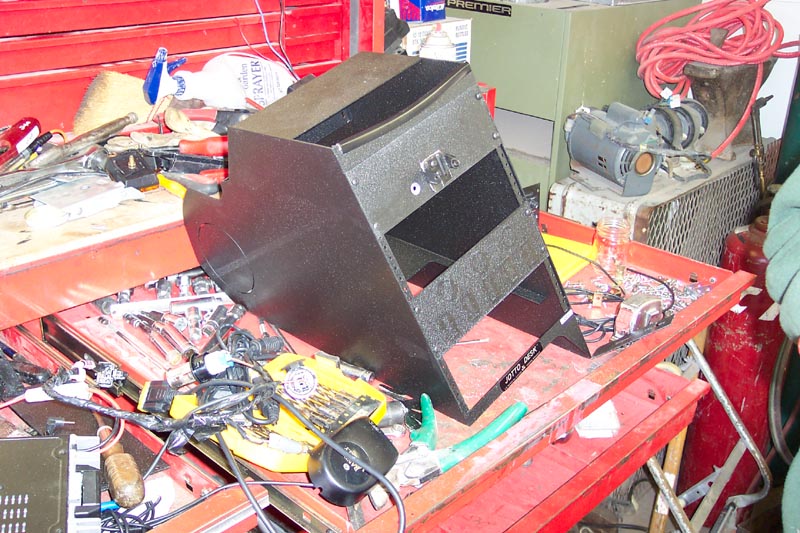
police departments around town. He was able to get me a special radio stand, the Jotto Desk Contour Console, for
the Impala that could be used to mount the amateur radios in the new car. This resulted in a radio
installation that is more orderly in appearance than the Lumina. As an added bonus, he threw in a
Jotto Desk computer mount
for the Impala. I normally do NOT have this in place, as it's pretty unwieldly. However, I keep it in the
trunk so it can be pulled out if needed, such as a ham radio event, etc.
New Car, Same Old Radios
We transferred the radios from the Lumina to the Impala, resulting in basically the
same configuration and VHF/UHF capabilities as before:
- Kenwood TM-D700A 2m/70cm radio
- Comet SSB-2 2m/70cm antenna on a Comet GR-5M stainless steel trunk mount (for the TM-D700A)
- Comet SSB-1 2m/70cm antenna on another Comet GR-5M stainless steel trunk mount (for the scanner)
- Rand McNally "mouse-style" GPS for the GPS feed to the Kenwood
- Radio Shack PRO-2046 scanner (now permanently installed in the Contour Console)
- Garmin GPS III Plus unit (optional, for mapping while driving)
This combination lets me hit the local repeaters within a decent range. The scanner has
not been used that much lately, and may eventually be replaced for another two-way radio.
I beacon the position of the car via APRS using the callsign WÏBSH-1. This helps
keep my friends amused as they watch me drive on trips. When I drive into
an area with poor APRS digipeater coverage, the position doesn't update, and then they
worry that I ran off the road. Fortunately, that hasn't happened yet. :-)
Installation Details
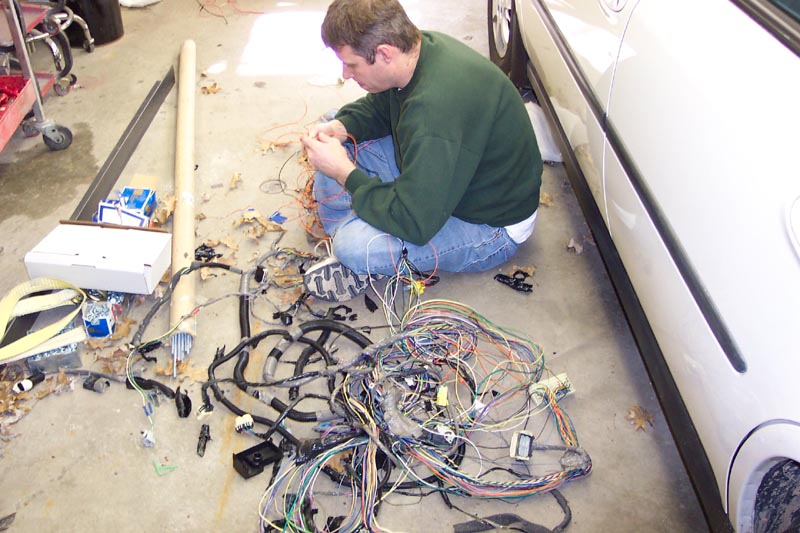
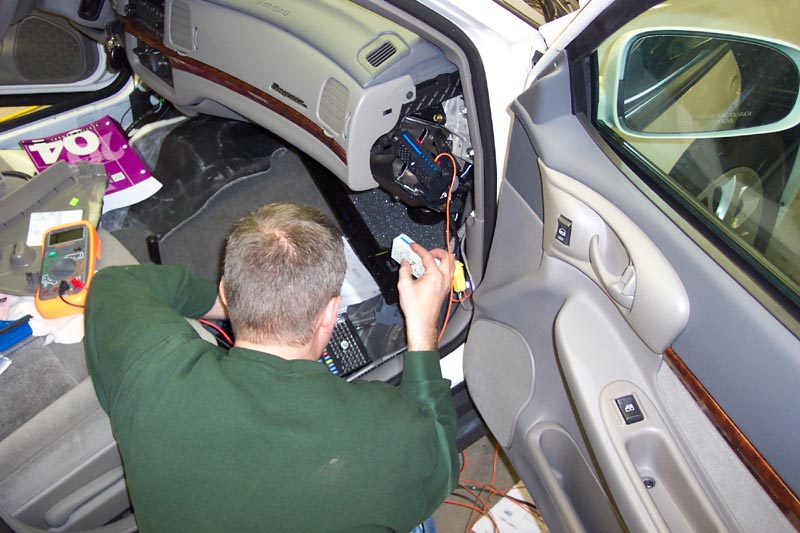
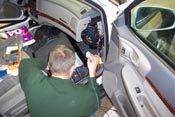
The installation of the radio equipment was considerably different for the Impala than for
the Lumina. Once again, I was able to enlist the help of my friend John Helterbrand, who parked
my brand new car in his garage and then calmly proceeded to strip apart the interior in front
of me, all while assuring me that he remembered "where everything went". (Fortunately, he did!)
|
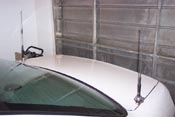
Antenna Installation
|
|
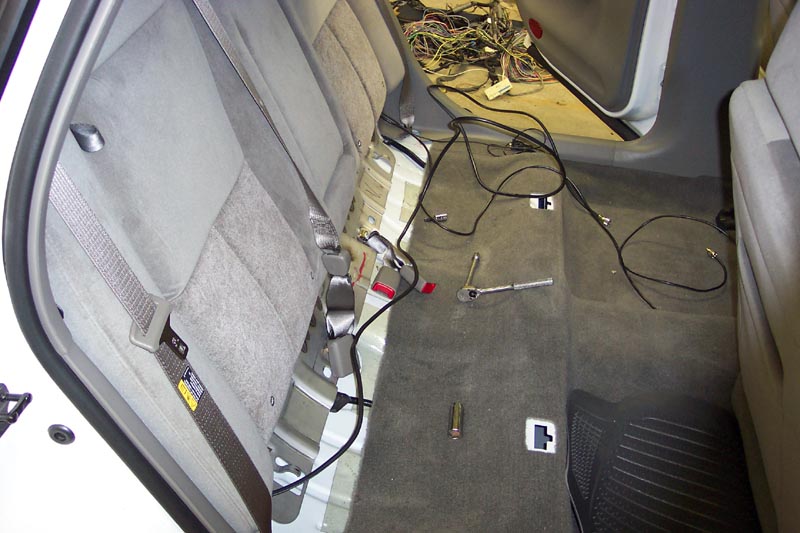
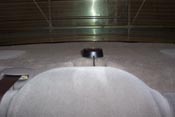
The Comet antennas are mounted to the trunk using Comet GR-5M stainless steel trunk
lip mounts. The SSB-2 is on the left in the photo, and is used for the Kenwood; the SSB-1
is on the right (driver's side) and is used for the scanner. A few reasons I really like
this mount are because 1) it is low-profile, 2) it is made of stainless steel, so it shouldn't
rust, and 3) it has four set screws, not two, to help hold it down better.
The mount was screwed to the trunk, and the coax fed under the package shelf into the passenger
compartment. With the back seat out, we were able to then fish the coax under the rug till each
lead popped out in front, so the coax runs going to the console are completely hidden.
|
|
|
GPS Setup
|
|
Since APRS is all about sending out your position, a GPS unit is necessary to
keep track of the Lumina's location. I chose the Rand McNally GPS unit, which
is a small unit with no screen that resembles a computer mouse. KÏSTL had been
using the same unit for his setup and said that it worked well and pulled very
little current, so I picked one up at a Rand McNally store in St. Louis for use
with the Lumina. After the Lumina was retired, the GPS moved to the Impala.
The unit has a long data cable attached that terminates in two ends. The first
end is a standard 9-pin DIN connection to send the data, and the second is a
PS/2-style mouse connector for the power. I purchased a PS/2 extension cable and
chopped off one end to provide access to the wires, which I then wired into the
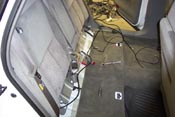
car to provide a power lead for the GPS to plug into. The GPS is located on the rear package
shelf, attached with some velcro tape. The data/power cable runs under the rug with
the antenna coax cables, and pops out in front behind the Contour Console.
The GPS unit is left on all the time. The current drain is so miniscule that I have
never had a problem with the battery being drained, not to mention that the GPS
usually maintains a satellite lock since it's always on.
|
|
|
Wiring
|
|
The police model of the Impala (the 9C1/9C3 versions) normally include
an extra wiring harness that can be used to run the radios, lights, etc.
that are typically placed in police cars. The civilian Impala does not
have this harness, but the fusebox does have the taps where they would
plug into.
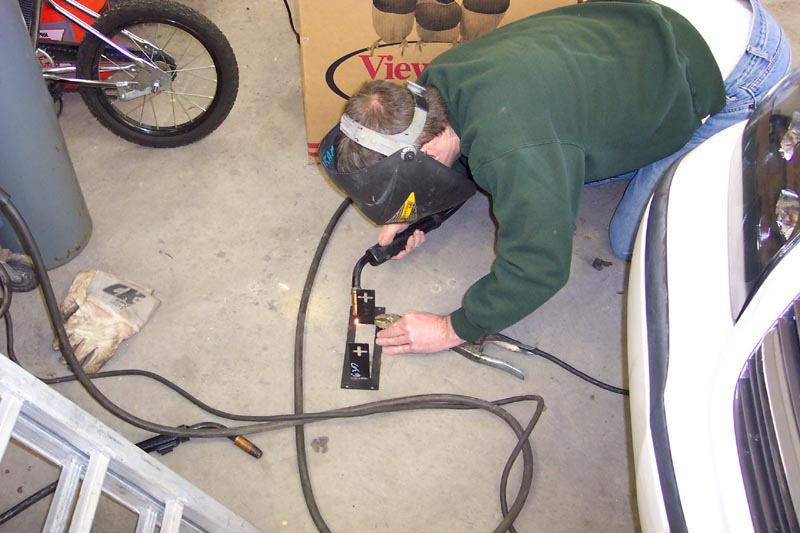
Using a wiring harness from a wrecked Impala, John was able
to fabricate a custom harness and then wire it into the fusebox. This
then runs behind the Contour Console, where the leads come out to be
plugged into the various electronic gear. Since the highest power the
TM-D700A transmits at is 50w, this does not strain the regular alternator
in my car.
The Contour Console also include two 12V receptacles. Since console
installation requires the removal of the Impala ashtray (where the 12V
receptacle normally is located), this is a nice feature and gives you an
extra receptacle to work with.
|

|
|
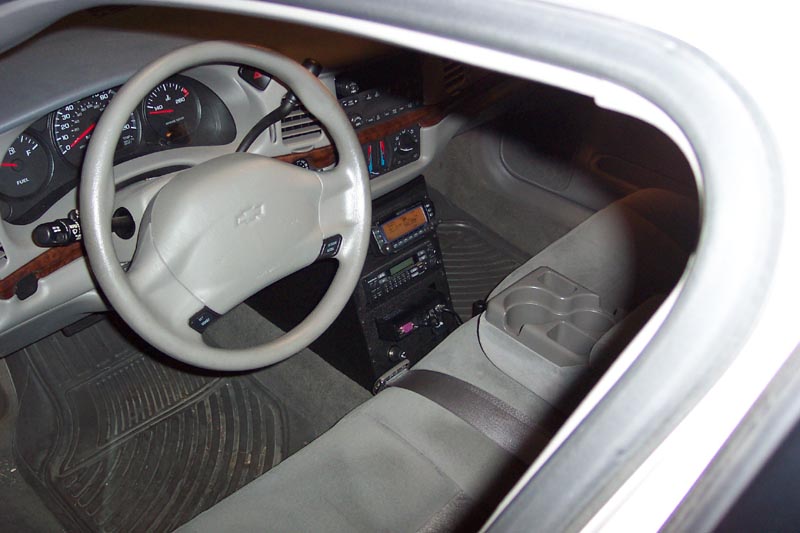
The Finished Product
|
|
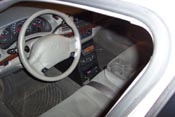
After installing the Contour Console, the seats were placed back
in the car, and this is the finished result. The console makes
it easy to access all the radios. When I use the Garmin GPS for
mapping while driving, I place it on top of the TM-D700A radio body.
It usually stays in place quite well.
My friends now affectionately call the Impala the "cop car"!
|
|
|