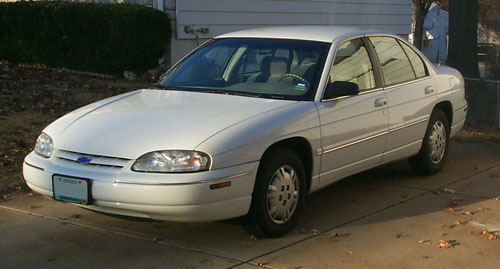
This 1996 Chevrolet Lumina was my daily driver. By November 2003, it had 136,000 miles on it,
and I sold it to my friend's parents who now use it as their main transportation for trips to the
casinos in Tunica, MS. It still runs great today! The rest of this page describes the car from
when I still had it.
I purchased this car new from Don Brown Chevrolet in St. Louis in 1995; it was my first new car.
It has covered many trips to the backwaters of the Midwest and East Coast.
Radio Equipped
When I got my ham radio ticket, it was a foregone conclusion that the Lumina
would get some radio gear put in it. It now sports a typical VHF/UHF mobile installation:
- Kenwood TM-D700A 2m/70cm radio
- Comet SSB-2 2m/70cm antenna on a Comet GR-5M stainless steel trunk mount
- Rand McNally "mouse-style" GPS for the GPS feed to the Kenwood
- Radio Shack PRO-2046 scanner (not always installed)
- Larsen 2m antenna in trunk (used when scanner is installed)
- Garmin GPS III Plus unit (optional, for mapping while driving)
This combination lets me hit the local repeaters within a decent range. I only put the
scanner in when I know I'm going to be beaconing on the D700's band A and talking on band B,
and need something else to scan frequencies (mainly when chasing trains).
I beacon the position of the car via APRS using the callsign KCÏJOW-1. This helps
keep my friends amused as they watch me drive on trips. When I drive into
an area with poor APRS digipeater coverage, the position doesn't update, and then they
worry that I ran off the road. Fortunately, that hasn't happened yet. :-)
Installation Details
Here is some information on how this equipment is installed. Many cars these days
are so ergonomically designed that it's hard to find a place to put anything. The Lumina,
however, has enough nooks and crannies that everything fell into place VERY well, making
the system pretty convenient to use. (Clicking on the smaller photos below will enlarge them.)
|
Antenna Installation
|
|
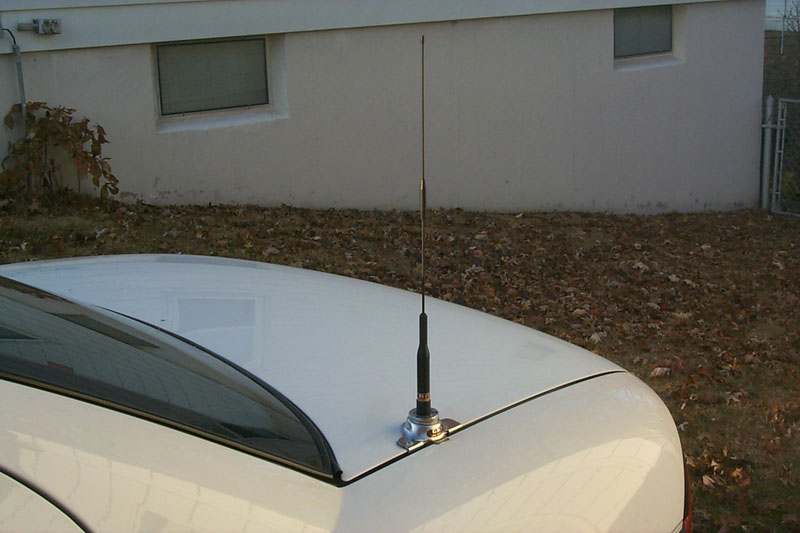
The Comet SSB-2 is mounted to the trunk using the Comet GR-5M stainless steel trunk
lip mount. A few reasons I really like this mount are because 1) it is low-profile,
2) it is made of stainless steel, so it shouldn't rust, and 3) it has four set screws, not
two, to help hold it down better.
The mount was screwed to the trunk, and the coax fed into the passenger compartment. Luminas
have a small hole in the metal structure under the package shelf, which provides a perfect
entry point for the antenna wire. The first time you do this, it is necessary to remove
the back seat so that you can lift the package shelf up to gain access to the hole, then you
can pull the wire through. However, I've done this enough times with this car that my back
seat is now limber enough to just pull it forward without having to unmount it!
Once the coax was fed through the hole, it was run along the top edge of the back seat,
then along the passenger side floor (under and around the trim) until it came out under
the passenger seat. In some places, the coax is too fat to fit under the trim, so I just
run it next to it.
|

|
|
GPS Setup
|
|
Since APRS is all about sending out your position, a GPS unit is necessary to
keep track of the Lumina's location. I chose the Rand McNally GPS unit, which
is a small unit with no screen that resembles a computer mouse. KÏSTL had been
using the same unit for his setup and said that it worked well and pulled very
little current, so I picked one up at a Rand McNally store in St. Louis.
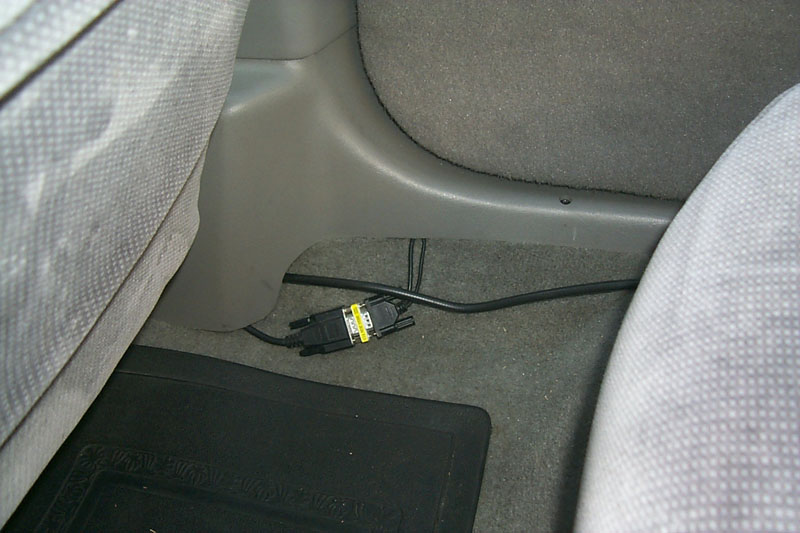
The unit has a long data cable attached that terminates in two ends. The first
end is a standard 9-pin DIN connection to send the data, and the second is a
PS/2-style mouse connector for the power. I purchased a PS/2 extension cable and
chopped off one end to provide access to the wires, which I then wired into the
car to provide a power lead for the GPS to plug into. The GPS is located on the rear package
shelf, attached with some velcro tape. The data/power cable runs along the back seat
and down the passenger side, same as the antenna coax cable. The data connection
hooks up to a null modem cable from the TM-D700A radio by the rear door (it ain't
pretty, but it works), while the power connector hooks to the modified PS/2 cable
coming from the fusebox.
The GPS unit is left on all the time. The current drain is so miniscule that I have
never had a problem with the battery being drained, not to mention that the GPS
usually maintains a satellite lock since it's always on.
|

|
|
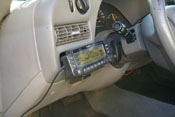
TM-D700A Radio Installation
|
|
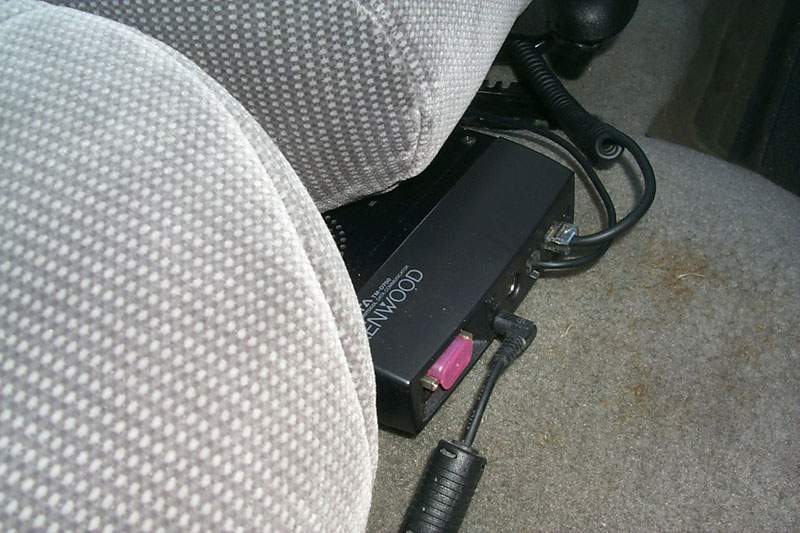
The Kenwood TM-D700A radio is a popular 2m/70cm unit which includes built-in
APRS capabilties, which is why I chose it for the car. The radio uses
a remote control head, so the actual radio unit can be tucked away somewhere.
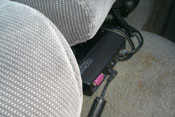
In my case, I placed it under the front seat, where it had easy access to
the antenna and GPS cables. The power cables run under the floor mat on
the passenger side, but that hasn't really proved to be a hindrance.
The TM-D700A includes a mounting bracket for the remote control head. I mounted
this in the eyeglass cubbyhole the Lumina features on the left side of the
dashboard, which turned out to be a very convenient location for the driver to use it.
Of course, my ham radio passengers grumble about not being able to see the
display because it's on the "wrong" side of the dash!
The microphone also plugs into the front of the TM-D700A unit, and hangs on a hook
near the glove compartment.
|
|
|
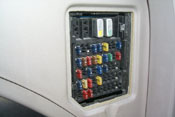
Wiring
|
|
My car is a stripped-down model, with the only power accessories
being power locks, air conditioning and a radio. This worked in my
favor when it came to wiring in the equipment. My friend
John Helterbrand helped set up the wiring for the radio, GPS and scanner
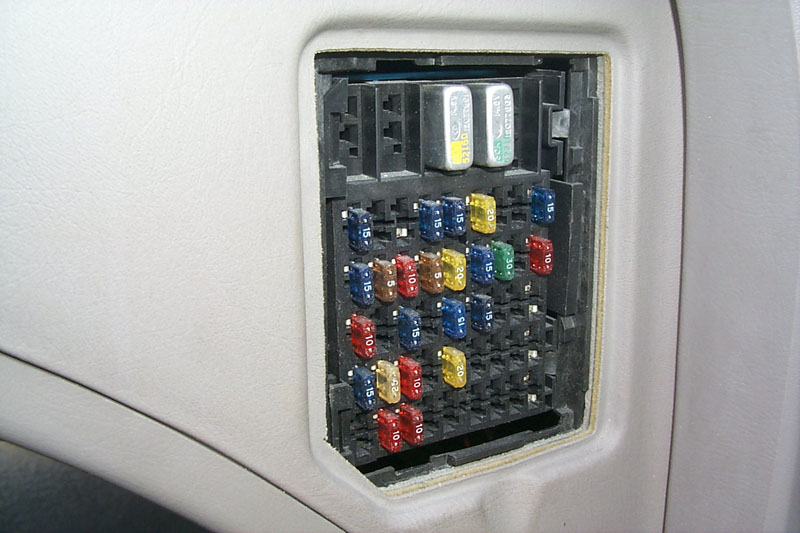
to attach to unused circuits in the fusebox. It turns out the circuit
for the power windows (which are not present in my car) was a perfect
fit for the D700 to plug in to, power-wise.
In the picture of the fusebox, the radio, GPS, and scanner are hooked
to the rightmost three fuses in this order:
- TM-D700A - 15 amp
- GPS - 10 amp
- PRO-2046 scanner - 10 amp (not inserted in picture)
John ran the wiring from the fusebox to the power leads of the
accessories. Since the highest power the TM-D700A transmits at is 50w, this
worked out perfectly, and was cleaner than having to run a wire through
the firewall directly to the battery.
|
|
|
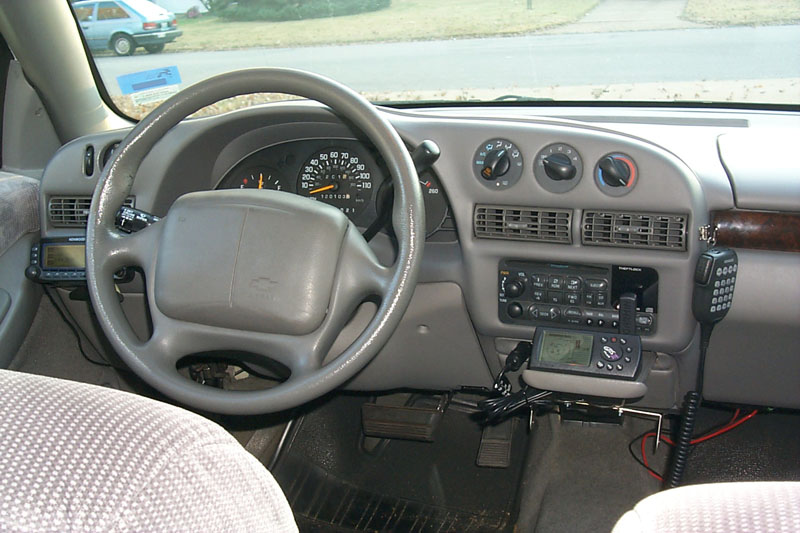
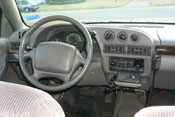
The Finished Product
|
|
Here you can see the dashboard with everything installed. The
TM-D700A remote console is on the left, the mic is on the right,
and the scanner would go below. The Garmin GPS used for mapping
while driving sits on the pull-out beverage holder, which almost
seems like it was designed for it.
|
|
|